
Connecting to the User Interface
Introduction
These instructions cover connecting a PC to a NEPI device remotely. If you are working directly on a NEPI device, you can skip this section.
Select your computer's operating system from the tabs below for step-by-step connection instructions.
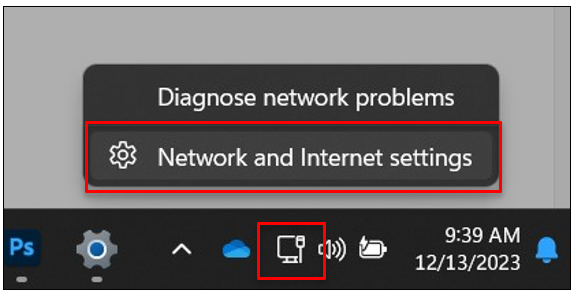
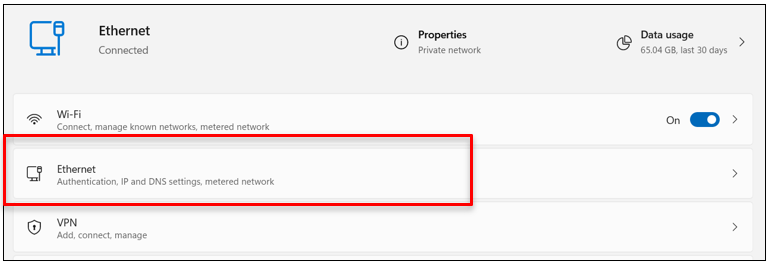
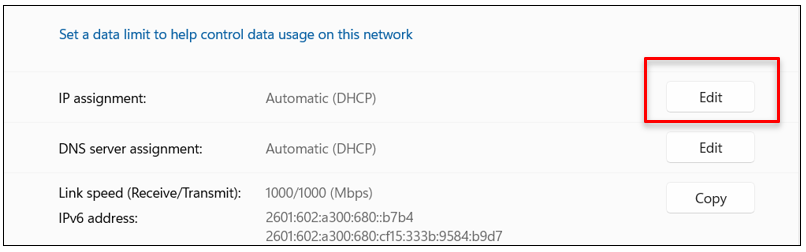
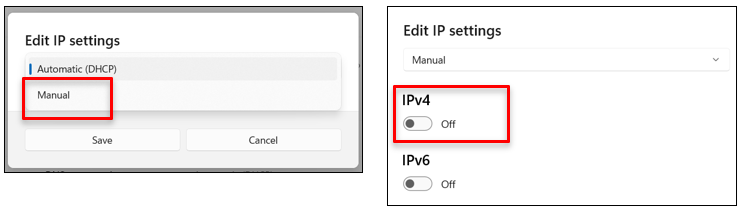
Connecting with a Network Cable on Windows
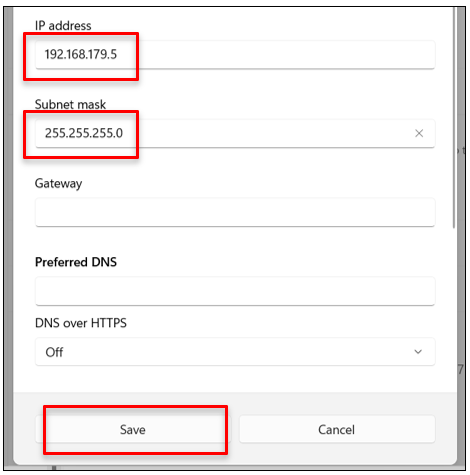
Example: PC Network Adapter Settings
IP Address: 192.168.179.5
Submask: 255.255.255.0
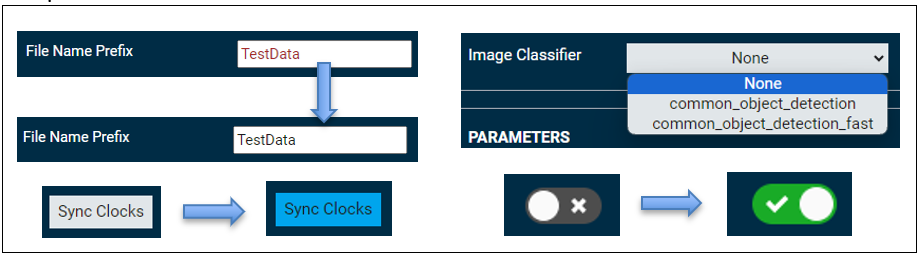
Accessing and Navigating the NEPI Device's RUI

Connecting with a Network Cable on macOS
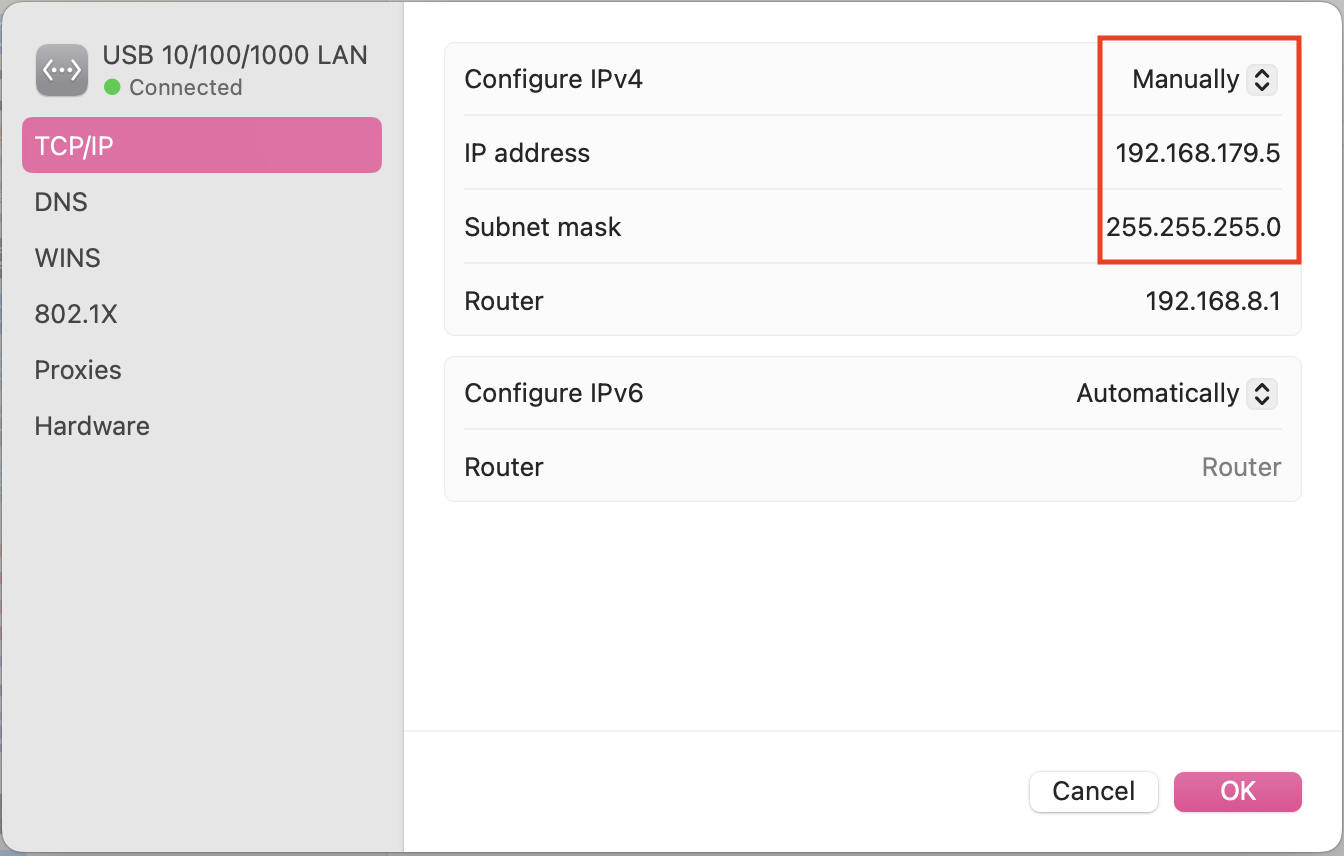
Example Static Network Settings for macOS
IP Address: 192.168.179.5
Subnet Mask: 255.255.255.0
1) Open Network Settings: Open System Settings. Scroll and select Network from the sidebar.
2) Select Your Ethernet Interface: Choose Ethernet from the list of available network interfaces.
3) Open IP Configuration: Select the Details button next to Ethernet, then choose the TCP/IP tab.
4) Change IPv4 Configuration: Locate the Configure IPv4 dropdown menu and select Manually.
Fill in the NEPI-Compatible Static IP following fields (if not done automatically):
IP Address: 192.168.179.5
Subnet Mask: 255.255.255.0
Select OK, then close the window. Your Mac will now use the static address.
5) Test Connectivity: Open the Terminal app (found in Applications → Utilities → Terminal). Input the following command:
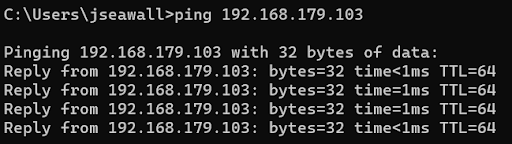
ping 192.168.179.103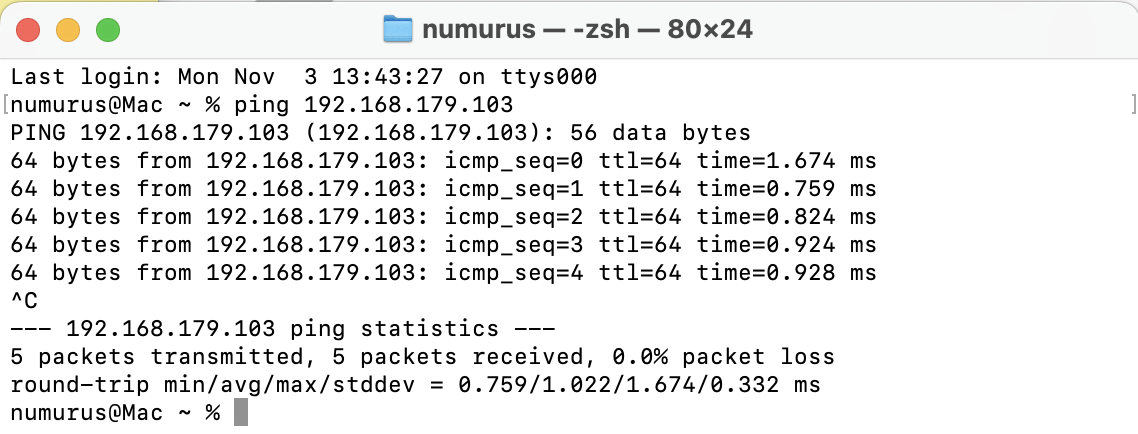
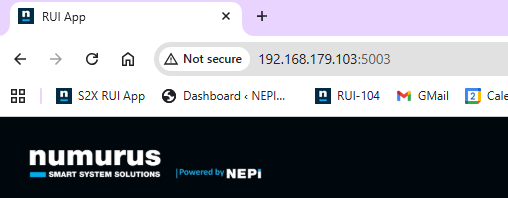
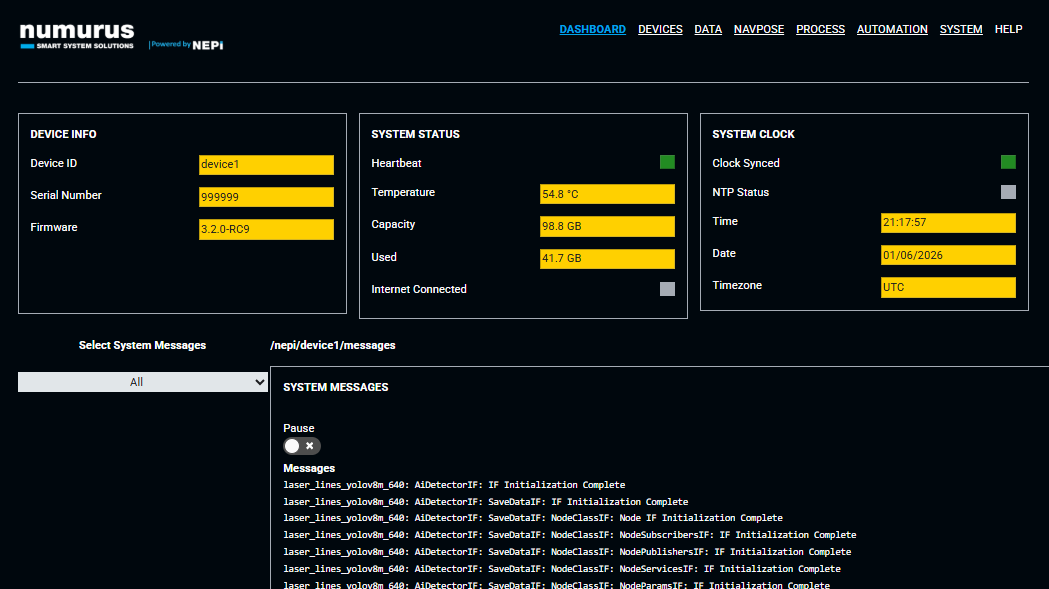
Accessing and Navigating the NEPI Device's RUI