
Getting Started With Hotspot
These instructions assume you have NEPI Engine software running on your computer and an Ethernet enabled edge-compute hardware platform.
If connecting with a USB to Ethernet adapter, follow these instructions.
Power On
Follow these steps to power on your devices before connecting.
- Plug in power cables for both the GL.NET and the NEPI device.
Connect Ethernet Enabled Edge-Compute Hardware Platform
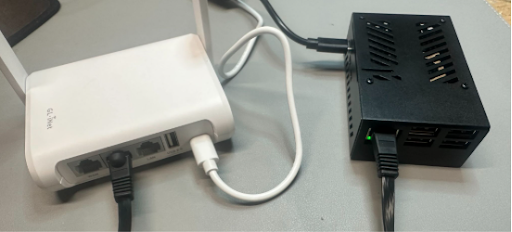
Use the included cable to establish a wired connection between the NEPI device and the GL.NET router.
- Plug the included Ethernet cable into your NEPI hardware and the other end into the LAN port on the GL.NET.
Default Wi-Fi Name and Password
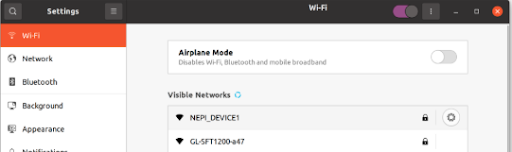
Your device broadcasts a Wi-Fi network using the following default credentials.
- Wi-Fi Name (SSID): NEPI_DEVICE1
- Wi-Fi Password: nepi#12345
Connect
On your computer, go to your Wi-Fi settings and connect to the hotspot using the password above.
Set Up Repeater
Open the GliNet admin panel at http://192.168.179.1/ and log in using the Wi-Fi password. Go to INTERNET > Repeater, then click Connect.
Select the Wi-Fi network you want to connect to from the list of available networks.
Enter the correct Wi-Fi password, then click Apply.
Open your Terminal, then run:
sshnh
Once you're on the system, run:
ninet
Then run the following to confirm the connection:
pingi
Wi-Fi is now enabled on your computer and on the NEPI hardware through the GliNet repeater.
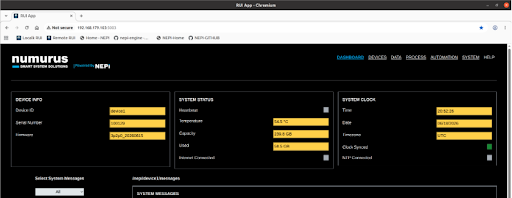
Open RUI
Open a browser and go to the NEPI Dashboard at http://192.168.179.103:5003/.
Follow Tutorials
The NEPI tutorials can be found at https://www.nepi.com/tutorials/.
Numurus LLC, Doc#: D103615-00