Getting Started With Hotspot
These instructions assume you have NEPI Engine software running on your computer and an Ethernet enabled edge-compute hardware platform.
If connecting with a USB to Ethernet adapter, follow these instructions.
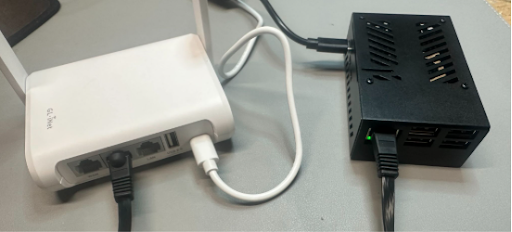
Power On
Follow these steps to power on your devices before connecting.
- Plug in power cables for both the GL.NET and the NEPI device.
Connect Ethernet Enabled Edge-Compute Hardware Platform
Use the included cable to establish a wired connection between the NEPI device and the GL.NET router.
- Plug the included Ethernet cable into your NEPI hardware and the other end into the LAN port on the GL.NET.
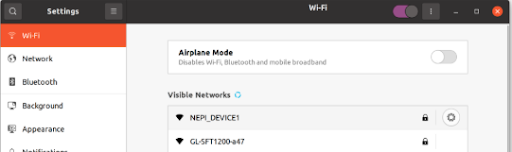
Default Wi-Fi Name and Password
Your device broadcasts a Wi-Fi network using the following default credentials.
- Wi-Fi Name (SSID): NEPI_DEVICE1
- Wi-Fi Password: nepi#12345
NOTE: These are factory defaults. You can change both the network name and password through the device's admin panel after connecting. Instructions for doing so are provided later in this guide.
Connect
On your computer, go to your Wi-Fi settings and connect to the hotspot using the password above.
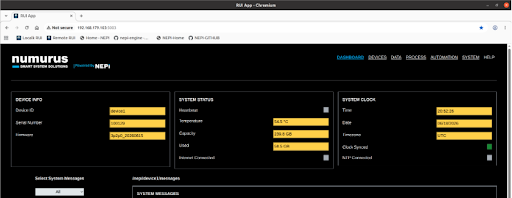
Open RUI
Open a browser and go to the NEPI Dashboard at http://192.168.179.103:5003/.
Follow Tutorials
The NEPI tutorials can be found at https://www.nepi.com/tutorials/.
Numurus LLC, Doc#: D103615-00